ArcGIS Field Maps Workflow (DI)
ArcGIS Field Maps is an application that allows you or multiple people to collect data while in the field, with or without WiFi/cell service.
This documentation describes how to use ArcGIS Field Maps and the workflow created for Dinosaur Institute field collections.
Setting Up
It is best to prepare as much as possible before a field trip. While Field Maps is meant to be used without an internet connection, there are a few steps that need to be completed before going out in the field.
Download the ArcGIS Field Maps on your device(s)
The ArcGIS Field Maps application is available on iOS, iPadOS and Android. Ensure that your device supports the current version of ArcGIS Field Maps.
Open the app and sign into ArcGIS Online
While not required, it is best practice for anyone who will be field collecting to use their own ArcGIS Online account. This will ensure that their username is recorded with each observance.
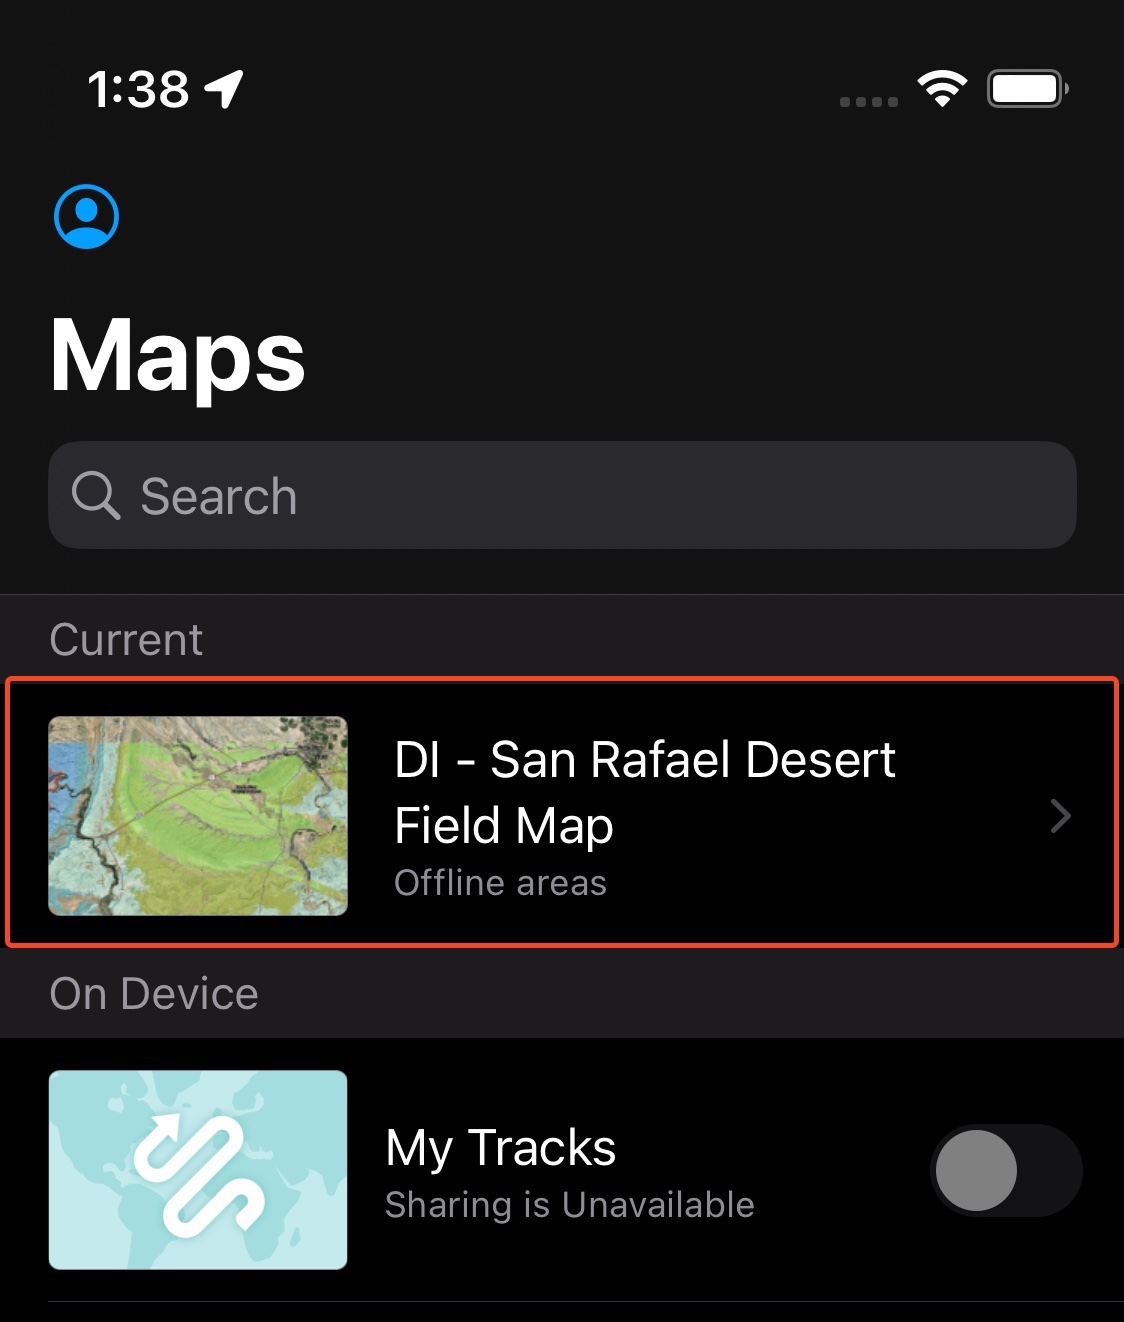
Open the "DI - San Rafael Desert Field Map"
You should see the map under "My Maps". If it is not showing up, try refreshing the page by pulling down.
Download Offine Areas
It can take awhile to download offline areas. It is therefore highly recommended to download areas in advance of a field excursion.
You should see three options:
- DI - San Rafael Desert Field Map_MapArea : this is the offline map that includes the entire geologic map of the San Rafael Desert quadrangle.
- Prospecting (K Units): A higher resolution subsection of the San Rafael Desert geologic map's predominantly Cretaceous units in the Northeastern section of the quadrangle.
- DI - San Rafael Desert Field Map : The default view of the field map that required connection to WiFi/cellular service.
To download an offline area, tap on the download icon to the right of the map (see below):
Test the map
It is always a good idea to test the application and the field map before going out in the field. If you've never used ArcGIS Field Maps, please refer to the guide below.
Using ArcGIS Field maps
This section is a brief introduction in how to use ArcGIS Field Maps. The following steps assume you are able to log into the application and have access to the DI - San Rafael Desert Field Map (see the above section).
Collecting points
Below is a brief overview on capturing points at your location. This guide uses the term "point" to refer to any collection event or observation.
There are two types of points available to add:
- Waypoints: Waypoints are areas of interest in the field — they are not meant to be ingested into EMu.
- Localities: These are collection events/locations that will be brought into the EMu Sites module.
Adding new Localities
Select one of the areas for DI - San Rafael Field Map
Tap Add 
Select "New Locality"
You'll be prompted to select one of two options (see screenshot below): "New Waypoint" or "New Locality":

Fill out the form and add any photos
A description of each field is described in the selection below.
Tap Add Point
This will add the point to the map, but will not save the point!
Tap Submit (top right)
This will save your point. If you are working online, others using the app or viewing the map on ArcGIS Online will immediately have access to the point and can perform edits. Otherwise, the point will be uploaded when internet connection is reestablished.
Editing points
If you wish to change the location or the info submitted about a point, you can easily edit a point on the app. Alternatively, the data can always be changed later on ArcGIS Online.
- Tap on a point displayed on the map
- To change its location:
- Pan to a new position on the map
- Tap Update Point
- To edit the form:
- Scroll to the field you wish to change
- Edit the information in the field
- Tap Submit
Copying points
If you are recording points that are very similar (perhaps only a few fields are changing with each recording), it might make more sense to copy a previous point and edit the appropriate fields. To do so:
-
Select the point you wish to copy
-
Tap the copy button
 at the bottom of the screen
This will take you to a form to edit your new copied point's attributes
at the bottom of the screen
This will take you to a form to edit your new copied point's attributes -
Tap Submit when you are finished editing the new point's attributes
DI Field Map Fields
A field in ArcGIS Field Maps/ArcGIS Online refer to any of the attributes of a point (i.e. the columns of the .csv that is exported from the feature layer). Below is an explanation of each field, its possible values (if they are controlled), its default value and what they are mapped to in DI's EMu Sites module.
| Field Name | Possible Values | Description |
|---|---|---|
| Field No* | - | The unique identifier for a field collection site, usually named by Luis/paleontologist |
| Loc Name | - | A short descriptive name for the site |
| Describer | - | The person describing the locality |
| Collection Date | - | Date and time when locality was collected |
| Loc Remarks | - | Verbatim locality description |
| Material | - | Preliminary identification of what was found at the site |
| Age | Cretaceous (Early, Late), Jurassic (Early, Middle Late), Triassic (Early, Middle, Late) | Geologic age of site |
| Formation | Morrison, Nelson, Burro Canyon | Formation name |
| County | San Juan, Grand, Garfield, Emory | County name |
| State | Utah, Colorado, New Mexico, Arizona | State name |
| VP Locality Description | - | Description of the locality |
*Field No is a required field.
Troubleshooting
Below is a list of common issues and how to troubleshoot them.
Can't find "DI - San Rafael Desert Field Map"
If the DI - San Rafael Desert Field Map, or any other field map you need, isn't showing up under "Maps" (see "Setting Up", point 4 in this documentation), try signning out/in of the app:
- Tap the Profile
 while viewing the "Maps" list
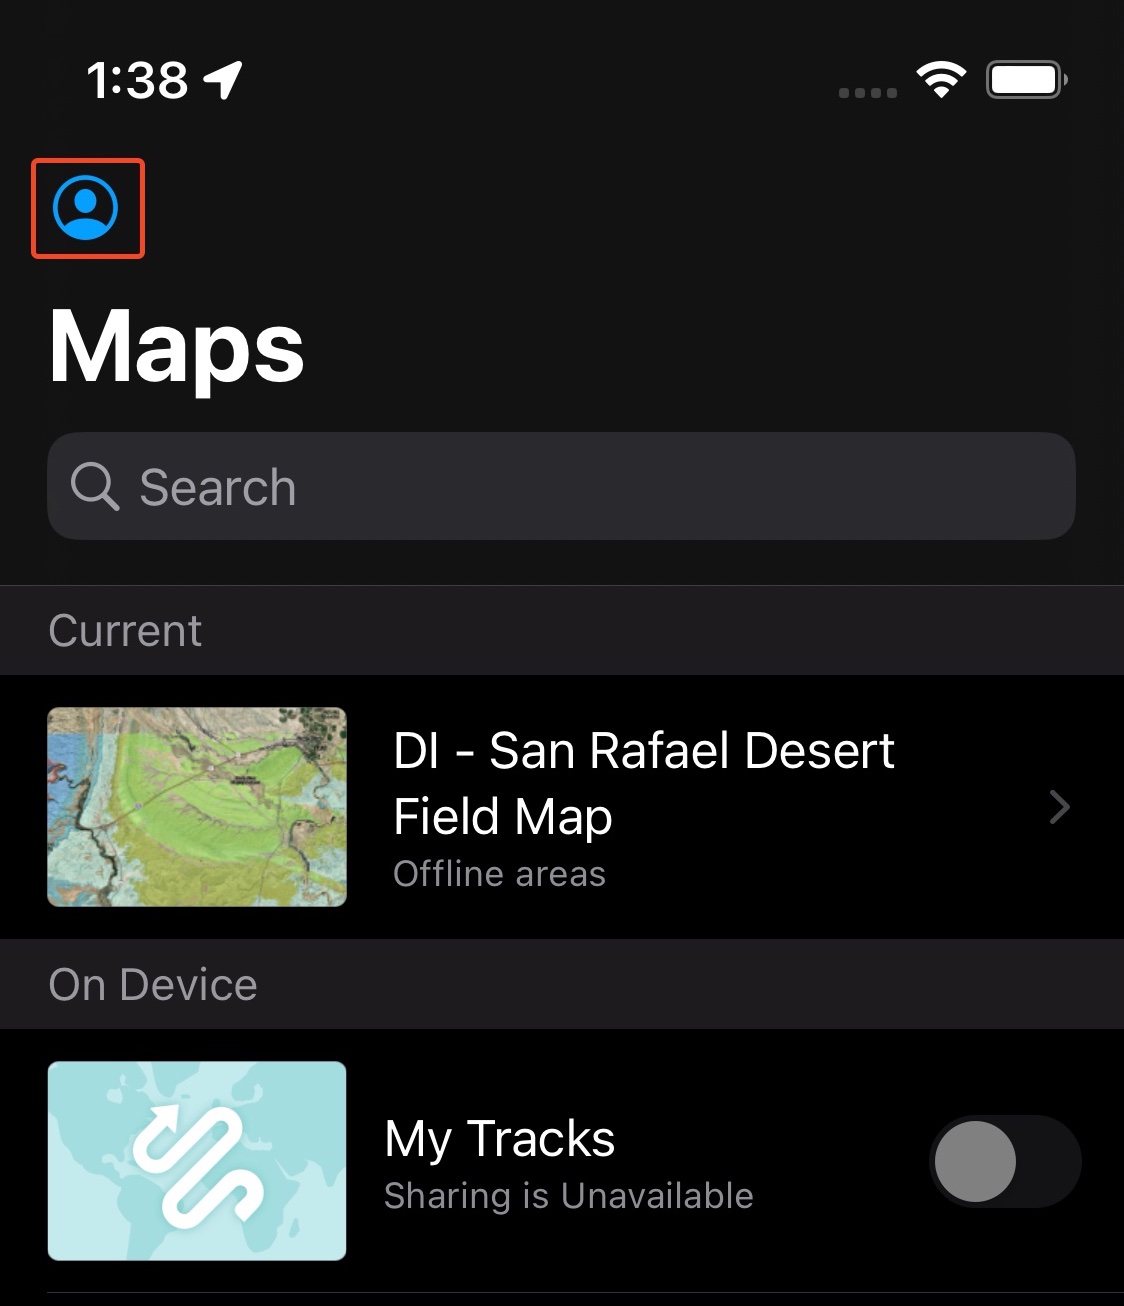
-
Scroll down and tap Sign Out (in red)
-
Sign back in with your ArcGIS Online account
"Poor Location Quality"
If you're getting an error when trying to add a point that reads "Poor Location Quality. GPS accuracy requirement isn't met", you need to change the minimum accuracy allowed for data collection.
-
Tap Add
-
Select "New Locality"
-
Tap "..."
-
Tap Collection Settings
-
Tap Accuracy
-
Change Distance (meters) to a higher number (default is 10m)
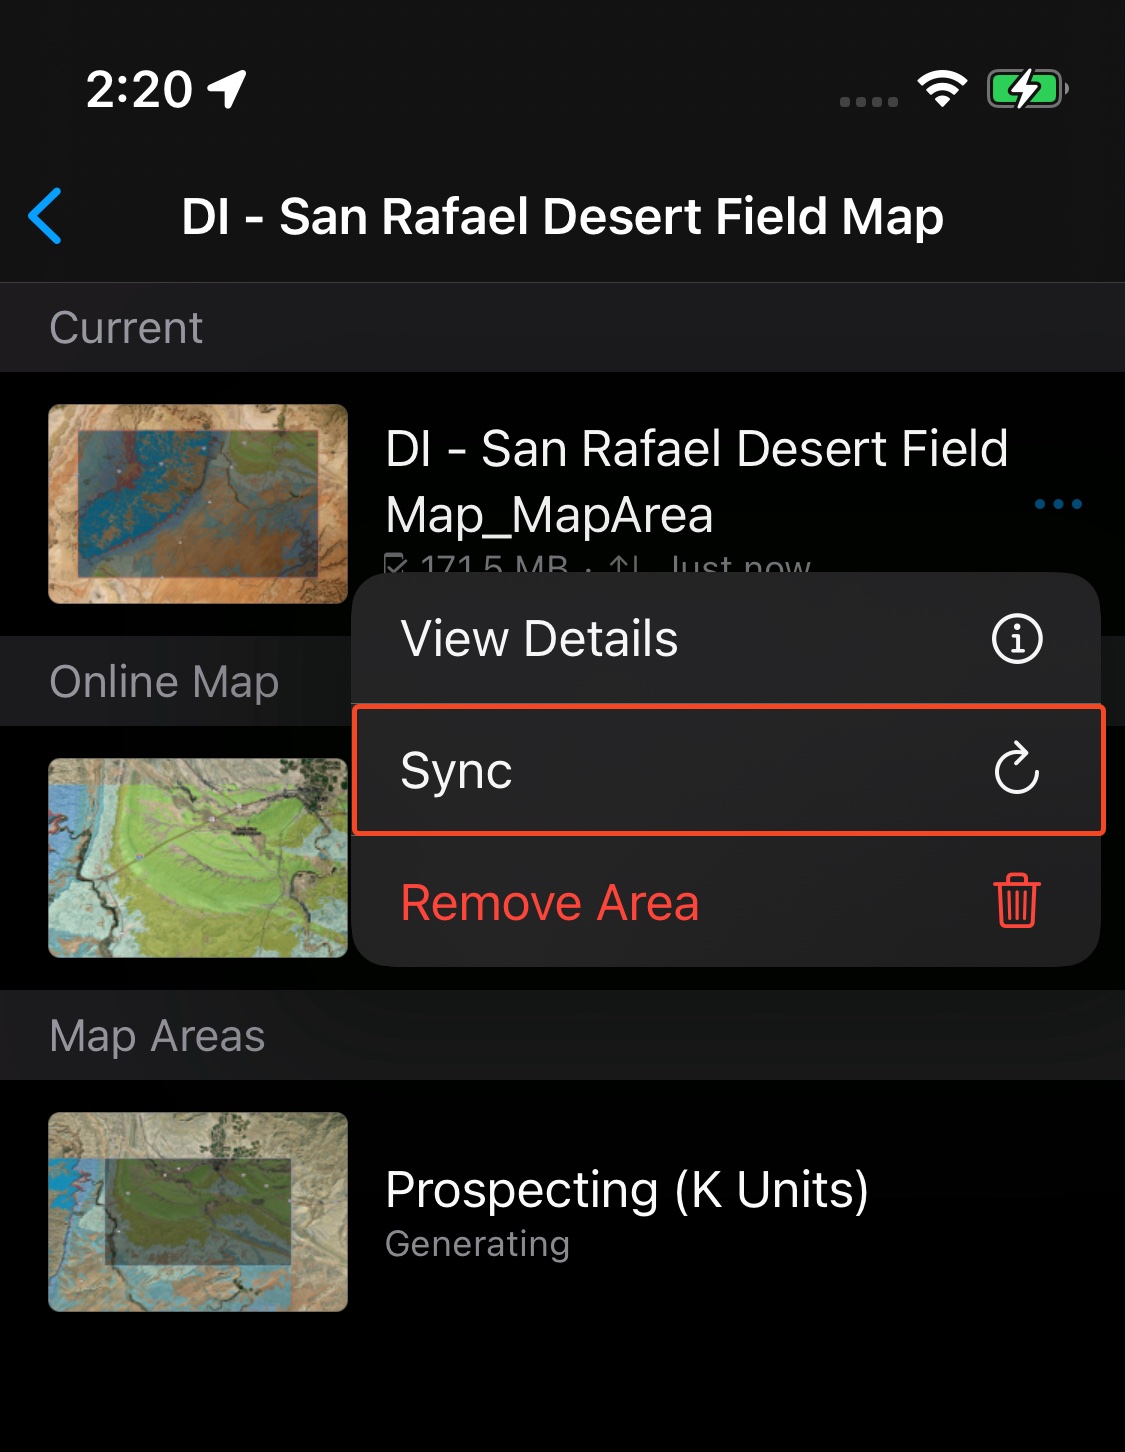
Offline area not syncing
When a device reconnects to the internet, it should automatically refresh offline maps with updated data. If syncing does not automatically happen, do the following:
-
Select the map from Maps
-
Find the offline map that is not syncing
-
Tap the "..." next to the map
-
Select Sync (see below)